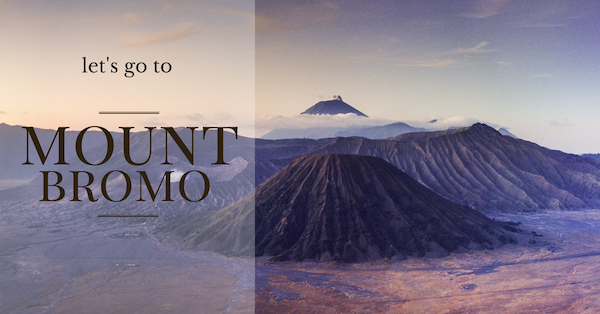
The When, Where and How of Shooting the Milky Way
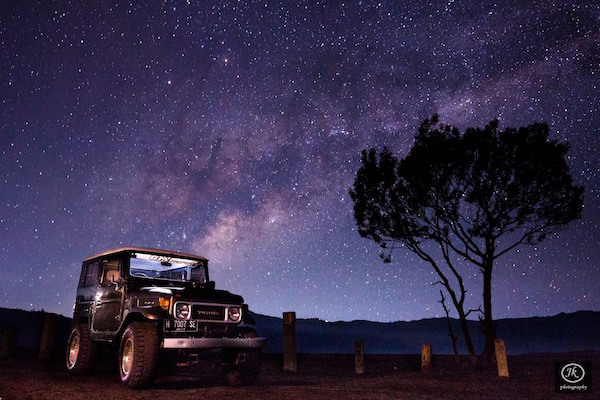
The Milky Way shot during our Travel Photography Workshop at Mount Bromo, Shot by Jothykumar
On almost every basic photography workshop, we have one or two participants who ask how to take pictures of the Milky Way or the Northern Lights. If you are not in touch with the world of astronomy, then you might ask what is the Milky Way? Without being too scientific, suffice to say that it is the billions of stars and the two parallel clouds of nebulae you see in the picture above and in parts of the world with very little artificial lights — think North Korea. Nah, think Lake Tekapo in New Zealand.
In fact if you gave an alien your address, the Milky Way would be a good starting point for them to home in on us, though they would still need to sift through 4 billion stars before they find the sun and finally, us.
So, the answer to the question on shooting the Milky Way often gets long and complicated as everything needs to be explained — from spotting the Milky Way to setting up the camera to capture it well. So this short article summarises these two requirements and serves as a handy guide to those who are going off on a astrophotography trip or just capturing stars having skipped the beach party for a more sober night with the heavens.
When?
Yes, turning up with the most expensive gear does not entitle you to witness a star filled sky. In fact the forces of the universe will not align in favour of you, knowing you have a $20,000 setup waiting for them to be captured. So the first task is to find out when to shoot the Milky Way.
A seamless shoot on a moonless sky. That pretty much sums it up. You have to ensure you have a moonless (and cloudless too!) sky so the entire sky is lighted up by stars and galaxies. Now, thanks to rapid progress in technology, you no longer need to call an astronomer to tell you when to go. Just go to app.photoephemeris.com and key in your date and location on to the app to find out the sunrise, sunset, moon rise and moonset timings.
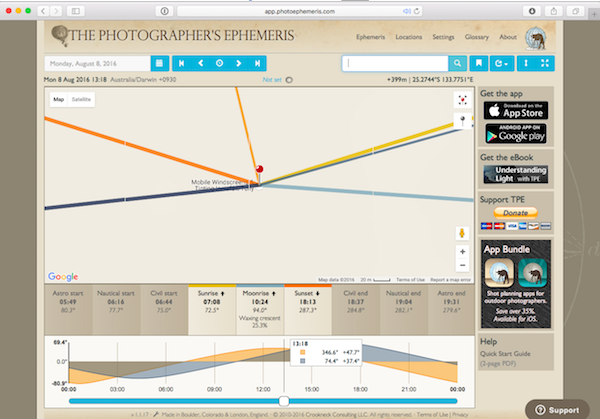
Photographer’s Ephemeris is a great online app for you to see when and where the sun and moon rise and set in any part of the world at any time; past, present or future
As easy as that. Before you ask, yes its free as long as you access it on a computer and not on a hand held device.
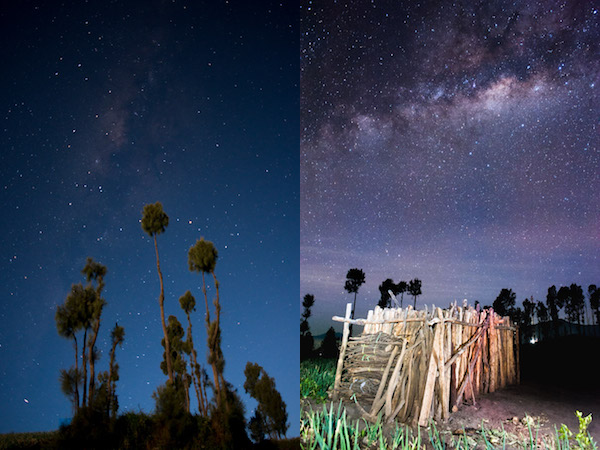
The Milky Way as seen on a full moon (left) and moonless night. The picture on the left was shot in the month of October where the (faint) Milky Way appears more vertical than the one on the right shot in May
Having moving clouds can obscure the night sky so its best to shoot with a clear sky for capturing the Milky Way
June to September is really the best time as the densest part of the Milky Way (called the “core”) is visible clearly within the non polar latitudes. October onwards months cause the Milky way to appear more vertical than horizontal. This is not a problem but the densest part of the Milky Way gets pushed closer to the horizon and does not appear in its full glory as it does during the other months. So as long as you are not living within the Arctic or Antarctic circle, or anywhere in the Southwest monsoon affected regions, you should be okay. Which brings us to the next question.
Where?
Summer in the northern hemisphere is winter in the Southern Hemisphere so you might have a cooler experience (literally and figuratively) shooting the Milky Way in a cool Australian Desert than in hot and humid Singapore or Malaysia.
We bring a group of photographers to Indonesia on a Travel Photography Workshop to Mount Bromo which makes for a great practice ground for astrophotography. Being about 2000 meters above sea level means we get clear skies and cool temperatures. Oh, we go there twice every year so do join us for the Travel photography workshop to Mount Bromo!
Privileged as we are living close to the equator (Singapore is 1 degree north of the equator) with the ability to see the whole Milky Way throughout the year, we consider it lucky if we get to see just 4 or 5 stars in the night sky. Light Pollution in Singapore is one of the highest in the world and apart from inaccessible areas, like the off-shore islands, the chances of catching the Milky Way are pretty bleak here. That coupled with inhuman humidity levels means cloudless skies are scarce let alone a star filled clear sky. Neighbours Malaysia and Indonesia have wide open and uninhabited areas where shooting the Milky Way is easier thanks to almost non-existent light pollution.
For the highest chances of capturing the Milky Way on a clear sky, places like deserts and scrublands (Western Australia) make for excellent locations as do high altitude places like mountain ranges and high altitude plateaus (Indian Himalayas in Ladakh and Spiti). Google is known to be a great place to find out such information.
How?
If you are reading this while traveling with a cellphone camera you might be in for a bit of disappointment. However, if you have a reasonably powerful camera (no I am not referring to megapixel count) that has some degree of manual control, you can capture some pretty amazing shots of the Milky Way. All DSLR’s will be up for the job as would mirrorless interchangeable lens cameras. Basically, if you have one that is capable of being operated on Manual mode, you’re good to go.
Here is the bad news though, you would need a tripod to get a steady shot of the Milky Way. At least until they develop an app on your phone that allows it to do so. Now, I know you hate carrying heavy stuff around but trust us, this is worth it. The shots you see in this post were all captured with tripods and you’ll start liking tripods once you see the results for yourself. If you think a dustbin or your spouse’s shoulder would be a good substitute for a reliable tripod then go ahead but we guarantee you, the tripod works better.
The technical settings are pretty straight forward if you are working on a moonless night with a tripod mounted camera:
- ISO 1600–6400
- Manual Exposure Mode (M)
- Shutter Speed of 15–30 seconds
- Aperture of 2.8−5.6
- Manual focus locked to focus on your foreground subject or on the Milky Way itself
Troubleshooting for exposure problems is quite easy as well:
- If the picture is too dark, set a higher ISO, or lower f/number. Dragging the shutter speed longer is not recommended because it would result in the start getting motion blurred.
- If the picture is too bright (unlikely on a moonless sky), quicken the shutter speed and/ or lower the ISO and/or increase the f/number (smaller aperture opening).
Wait, I’m all set up but I cant see the Milky Way! Yes, so the part on “How?” is just not about how to to setup your camera but also how to spot the Milky Way. We wouldn’t shortchange you that way would we?
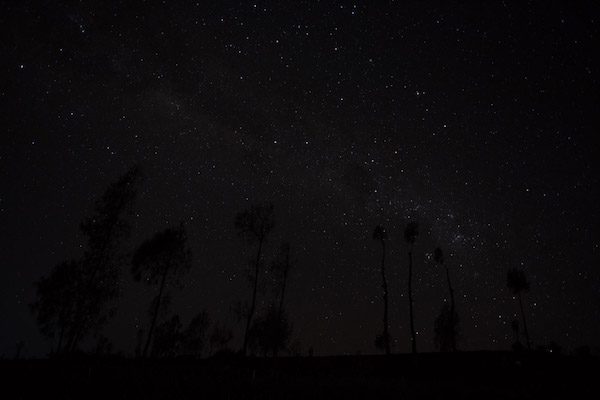
The Milky Way as it appears to the naked eye
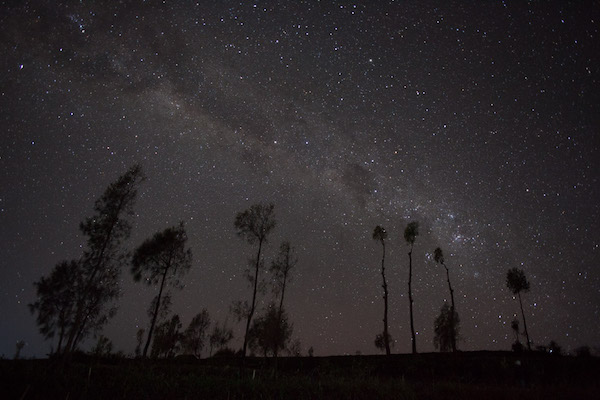
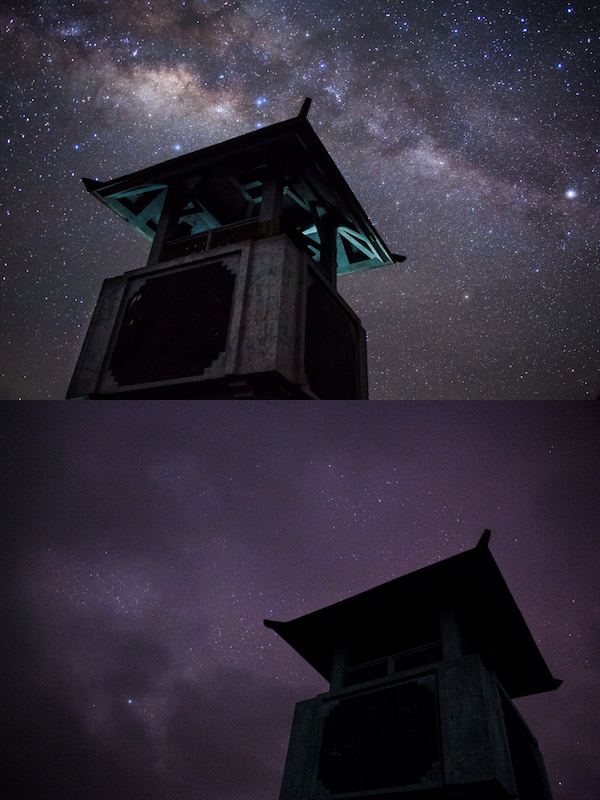
The Milky Way as seen straight out of the camera (no post processing)
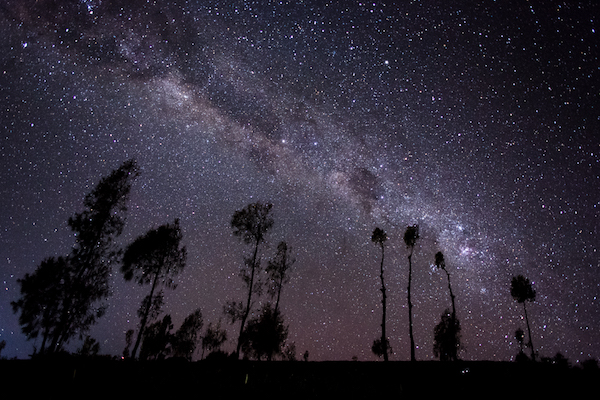
The Milky Way after boosting contrast and colour corrections on Adobe Lightroom
To the naked eye, the Milky way is little more than a faint mist with a tea pot like constellation (Sagitarius) below and a long snake like constellation (Scorpio) stretching across this faint mist. Wait, before you start seeing stars (literally and figuratively) do yourself a favour and download this app called Stellurium. Yes yes, its free as well. Gosh, you freeloader!
However if you like something more portable (and are willing to spend $3) you can try Star Walk that will also work on your mobile phone so you can bring it along and see what planets and stars are being captured by your camera.
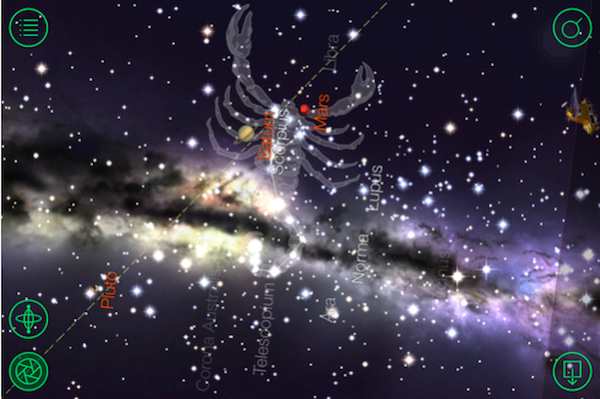
Using Star Walk on your phone or tablet allows you to see the constellations as they appear in the sky. The two mist patches you see running through the constellation Scorpio is the Milky Way.
The camera captures a lot more than what your eyes see so the Milky way appears a lot more clearly on your camera than with the naked eye. In fact one way to see where the Milky Way is to shoot a wide angle picture of the night sky with the settings above and see where you see the faint misty nebulae and adjust the camera accordingly to accommodate it in your frame. Slow and painful but doable. But don’t take too long because the Milky Way moves pretty fast.
The short animation below shows a half an hour time frame compressed in to 6 seconds.
This was from 7.45pm to 8.15pm so even if the Milky way is there in the sky all night long its not easy to capture once its directly overhead. A shot of just the Milky way will work nicely for a book on astronomy but won’t be the best record of your holiday under the clear skies.
So there is possibly one last tip we can offer. Shoot your Milky Way shot with something in the foreground, even if that something is someone. Like the shot below where we took motorcycles to the Sea of Sand (Pasir Laut) at Mount Bromo. The motorcycle riders waited as we shot the night sky and lit up a fire to keep themselves warm. They make a good foreground while in contrast with the depth of the Milky Way above.
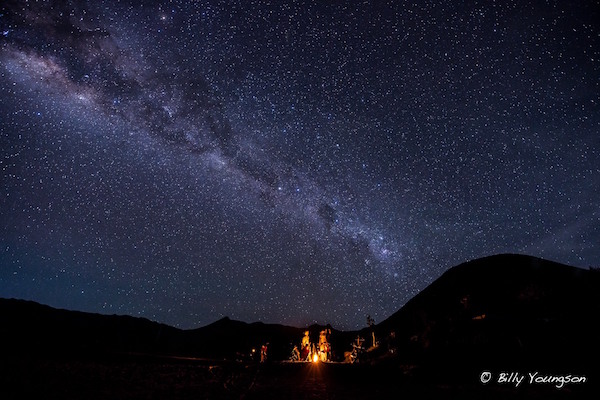
Motorcyclists warming themselves by a fire under the stars shot by Billy Youngson
So until someone develops a phone or an app for a phone that allows you to shoot the Milky Way hand held (I sense that day is not far away), you would need a good tripod and some additional tools to help you find and shoot the Milky Way with minimum fuss.
If you like what you’ve seen here, do join us on the travel photography workshop to Mount Bromo!
Comments are closed on this post.